Augmented reality shopping tools have become increasingly user-friendly, enabling shoppers of all technical skill levels to visualize products before purchase. This comprehensive guide walks through the most popular AR shopping experiences and explains how to use them effectively across different product categories.
Understanding AR Shopping Technology Basics
Before diving into specific platforms, it helps to understand what AR shopping does. AR overlays digital representations of products onto your real environment—either your physical space or directly onto your body—using your device’s camera. The technology uses facial recognition for beauty products, environmental scanning for furniture, and body detection for fashion items.
Device Requirements: Most AR shopping tools work on modern smartphones with either iOS 11 or later (iPhone 6s and newer) or Android 7.0 or later. Ensure your device has a functioning camera, sufficient storage space (typically 50-100MB for apps), and adequate battery life for extended shopping sessions. For optimal performance, use a device with 4GB RAM or higher.
Permission Settings: AR apps require camera access to function. When launching any AR shopping app for the first time, you’ll be prompted to grant camera permissions. Always enable these permissions; without them, the AR features cannot operate. Some apps may also request access to your photo library or storage—these permissions enable saving and sharing your AR visualizations.
Using AR for Makeup and Beauty Products
Getting Started with YouCam Makeup
YouCam Makeup is one of the most popular AR beauty apps, enabling real-time virtual makeup try-on across hundreds of products from multiple brands.
Step 1: Download and Installation
- Visit the Apple App Store (iOS) or Google Play Store (Android)
- Search for “YouCam Makeup” and tap Install
- Wait for the app to download and install completely
- Open the app and allow camera permissions when prompted
- Create an account or log in to an existing account
Step 2: Access the Virtual Try-On Feature
- Once logged in, you’ll see the main interface with a camera view of your face
- Look for the “Try-On” or “Virtual Try-On” tab at the bottom of the screen
- The app automatically activates your device’s front-facing camera
- Allow the app a moment to detect your facial features (indicated by facial mapping points appearing on screen)
Step 3: Browse and Select Products
- The app displays makeup categories: Lipstick, Eyeshadow, Foundation, Blush, and more
- Tap on the category you want to try
- Swipe through product options to browse available shades and brands
- The selected product immediately applies to your face in real-time
- Each brand offers multiple shades; swipe left or right to cycle through options
Step 4: Experiment and Adjust
- Once a product is applied, you can:
- Change shades by swiping through color options
- Switch products by tapping different items
- Adjust product intensity using sliders (if available)
- Move your face to see how the product looks from different angles
- The app updates in real-time, showing exactly how each product appears on your specific complexion
- Experiment with combinations—try multiple eyeshadows, lipsticks, and blushes together
Step 5: Save and Reference Your Look
- Once you’ve created a look you like, tap the heart icon to save it
- The app stores your saved looks in a “My Looks” section for future reference
- For makeup looks created within YouCam or preset looks, tap the “heart-plus icon” to view the exact products and application techniques used
- A detailed list appears showing every product, specific shade, and how it was applied—this serves as your blueprint for purchasing
Step 6: Purchase and Share
- From the saved look view, you can directly purchase products through integrated shopping features
- Alternatively, take a screenshot of your look and search for the specific products on your preferred retailer’s website
- Share your virtual makeup look on social media (Instagram, Snapchat, TikTok) through the app’s sharing feature
Pro Tips for Beauty AR Try-On:
- Ensure good lighting when using the app—natural daylight produces the most accurate color representation
- Hold your device at eye level for the most realistic preview
- Keep your face steady during application to allow the app’s facial tracking to maintain accuracy
- Try products on both light and dark backgrounds to see how they appear in various lighting conditions
- Compare multiple shades side-by-side rather than switching between products rapidly
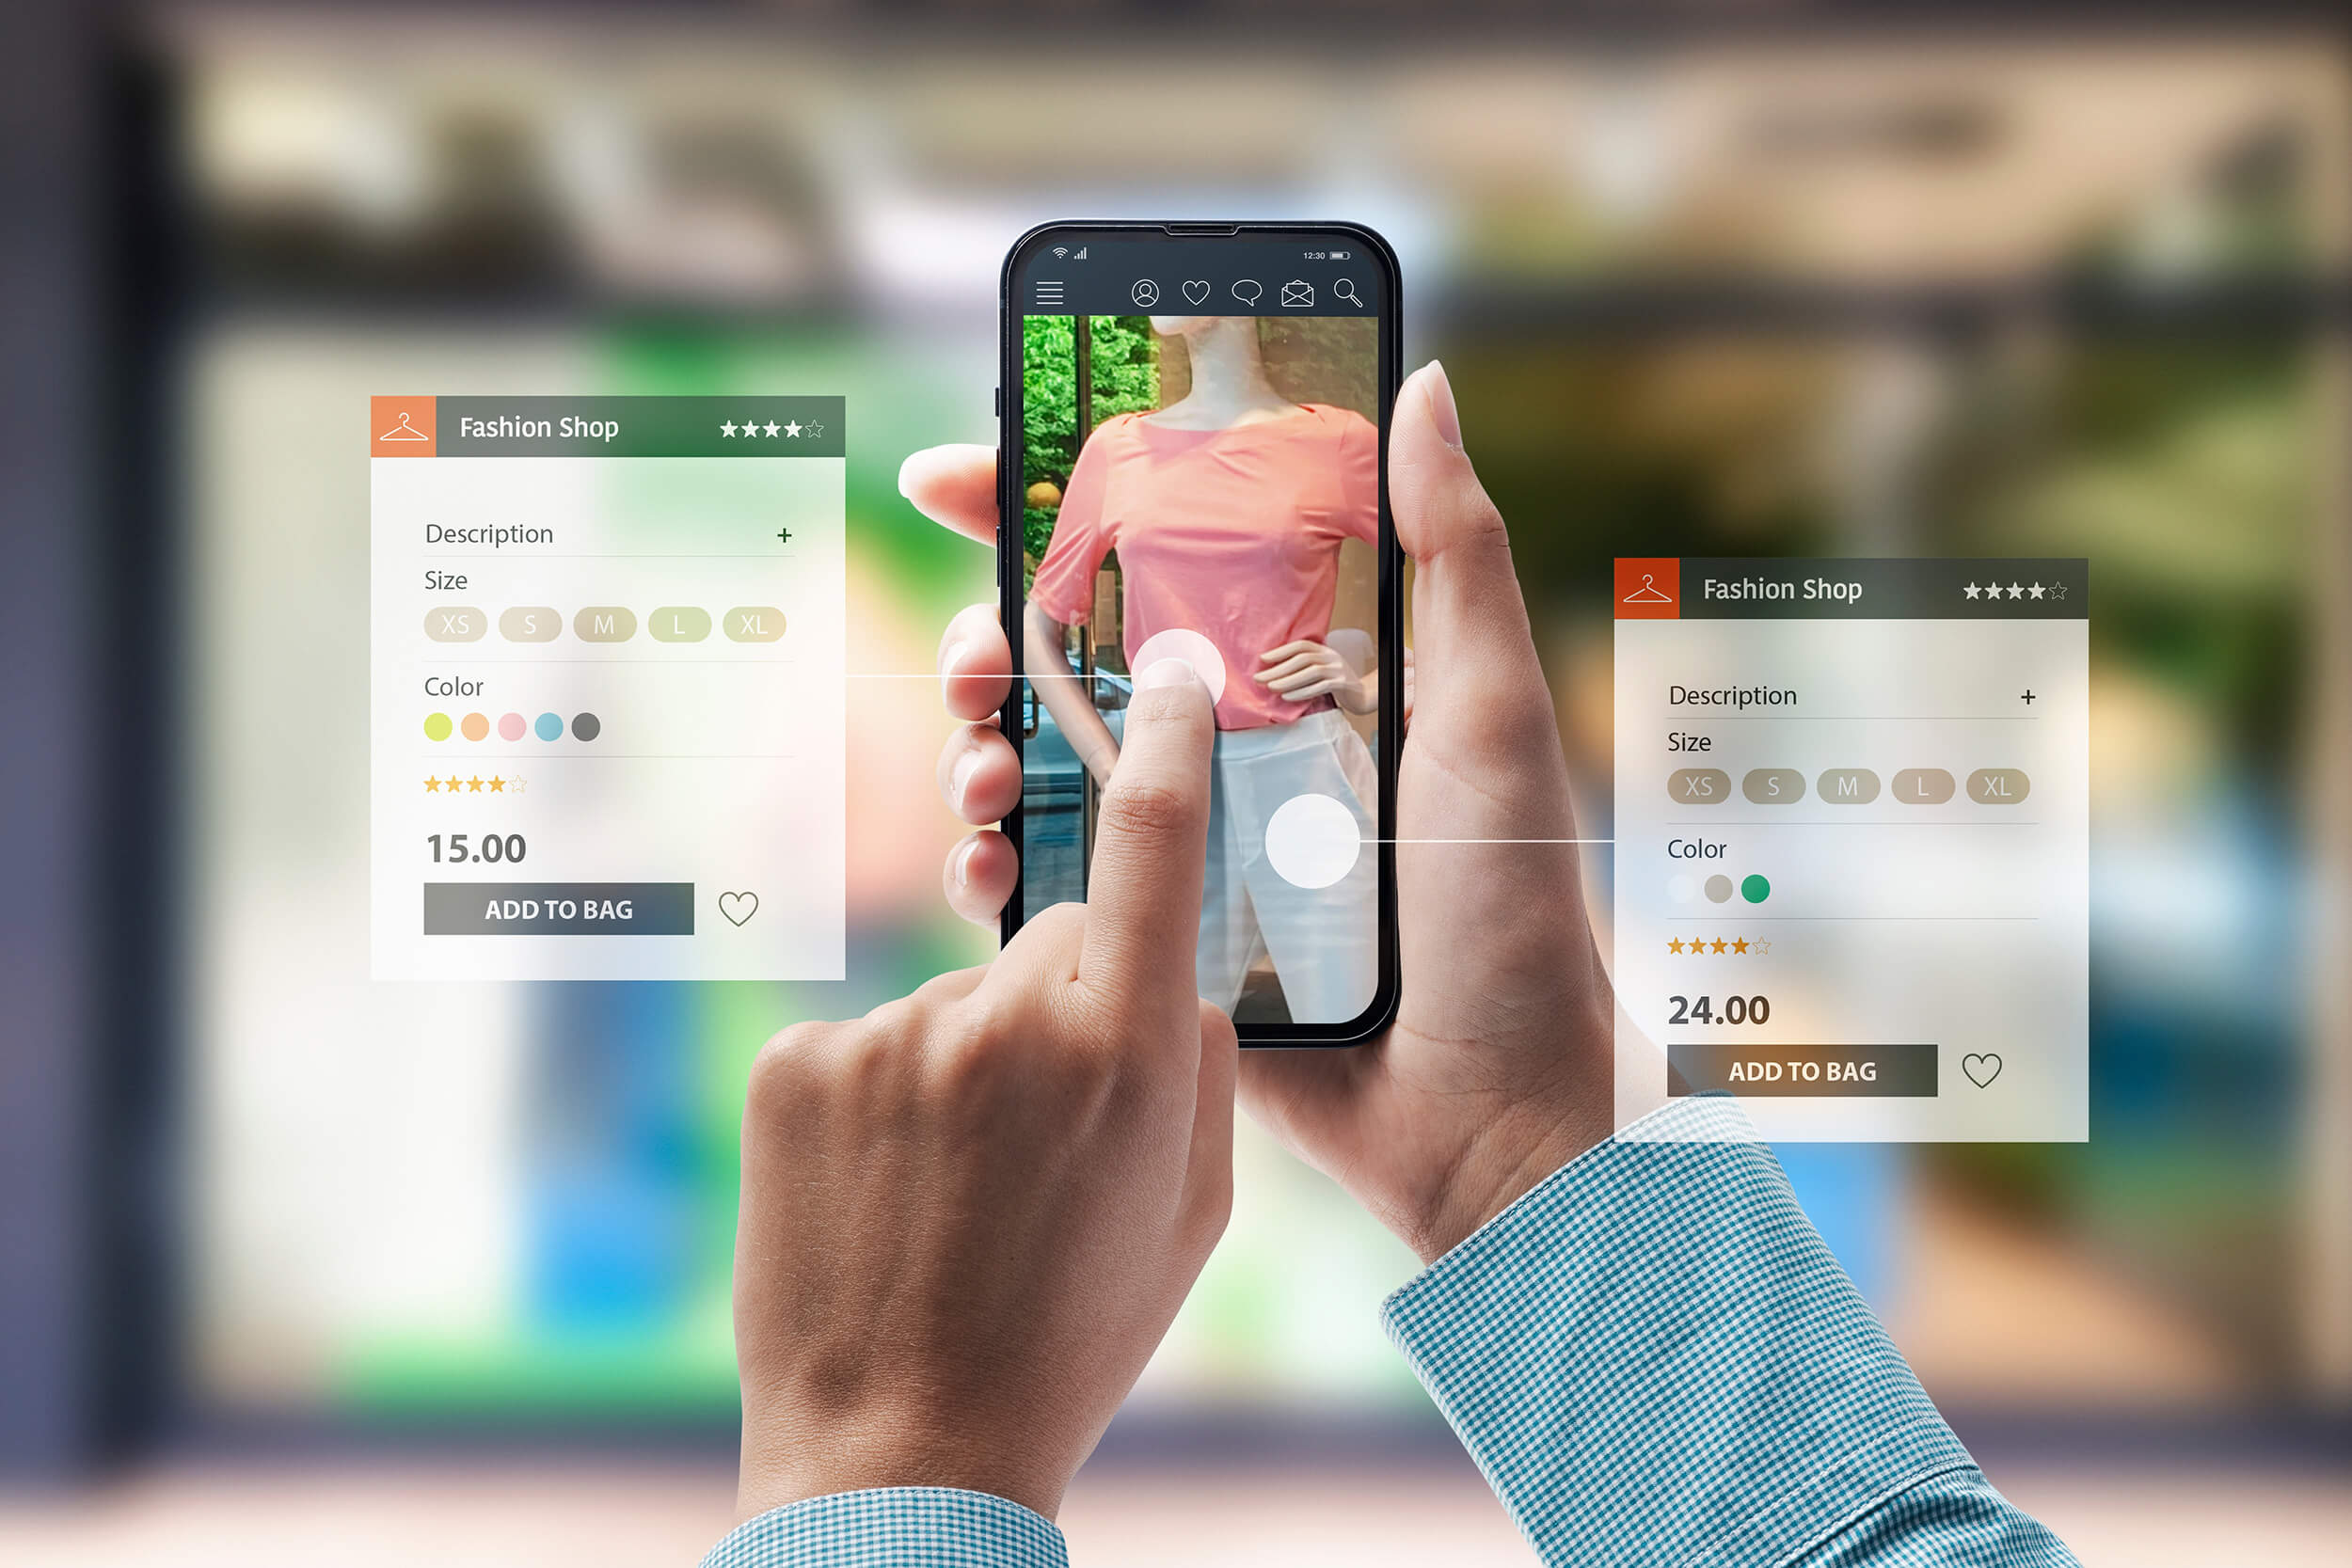
Using AR for Fashion and Clothing Products
Google Virtual Try-On for Clothing
Google’s Virtual Try-On integrates directly into Google Search and Shopping, enabling you to see how clothes appear on your body using your own photo.
Step 1: Search for Clothing Products
- Open Google Search or navigate to Google Shopping
- Type what you’re looking for (e.g., “women’s tops,” “men’s jackets,” “dresses”)
- Browse search results looking for products displaying a “Try On” badge
Step 2: Access the Try-On Feature
- Tap or click on a product with the “Try On” badge
- The product detail page opens with a “Try it on” button
- Tap this button to launch the virtual try-on experience
Step 3: Select Your Try-On Method
- Two options appear: “Try it on” (using your own photo) or “Select a model” (choosing from diverse body types and sizes)
- To use your own photo:
- Tap “Try it on”
- Upload a full-body photo of yourself
- For best results, ensure the photo shows:
- Your entire body from head to toe
- Good lighting
- Fitted clothing you’re wearing
- To use a model:
- Tap “Select a model”
- Scroll through dozens of models representing diverse sizes, skin tones, and body types
- Tap the model closest to your size and appearance
Step 4: View the Virtual Try-On
- The AI generates a realistic image showing how the garment appears on you (or your selected model)
- You can zoom in to examine details, fabric texture, and fit
- Rotate or examine the garment from multiple angles to assess how it drapes and fits
Step 5: Refine Your Search
- Use filters at the top of the screen to:
- Change the garment’s color
- Modify style options (e.g., sleeve length)
- Adjust pattern if applicable
- The try-on updates instantly to show how each variation appears
- Browse similar products by tapping “Similar Products” to see alternative brands or sellers offering comparable items
Step 6: Purchase
- Once satisfied, tap “Buy Now”
- The button directs you to the seller’s website to complete your purchase
Pro Tips for Clothing Try-On:
- Upload photos showing you in fitted clothing to improve accuracy
- Use photos taken in good natural lighting rather than poor indoor lighting
- Ensure your full body is visible in uploaded photos
- Try multiple color variations to find the shade that works best for you
- Compare how items appear on different body types by selecting various models
Using AR for Furniture Placement
IKEA Place App: Complete Walkthrough
IKEA Place is the industry-leading AR furniture visualization app, enabling customers to see how furniture looks in their actual spaces before purchasing.
Step 1: Download and Setup
- Upgrade your Apple device to iOS 11 or later (IKEA Place requires ARKit compatibility)
- Search for “IKEA Place” in the App Store
- Download and install the app
- Launch the app and allow camera permissions
Step 2: Scan Your Space
- The app opens with your device’s camera view
- Point your camera at the floor area where you want to place furniture
- Move your device slowly around the space for 2-3 seconds
- The app analyzes the floor surface, detecting its dimensions and texture
- A placement grid appears when the app successfully detects a floor surface
Step 3: Browse the Furniture Catalog
- Tap the catalog button (typically a menu or shopping bag icon)
- Browse IKEA products available in the app
- Initially, IKEA Place featured limited categories: sofas, armchairs, tables, footstools, and chairs
- Use the search function to find specific items by name or category
- Tap a product to select it
Step 4: Place Furniture in Your Space
- Once you’ve selected an item, it appears in your camera view as a 3D digital model
- Tap and drag the furniture to position it precisely where you want it on the floor
- The furniture automatically scales to true size, matching your actual room dimensions
- You can place multiple furniture items in the same room to see how they coordinate
Step 5: Adjust and Rotate Items
- Tap the furniture item to select it
- Use two-finger rotation gestures to rotate the item 360 degrees
- View how the furniture looks from different angles
- Adjust positioning by dragging the item to new locations
- If placement is difficult, release and try a different area—sometimes the floor detection needs to be reestablished
Step 6: Capture and Save Your Design
- Once satisfied with your arrangement, tap the camera icon to capture a photo or video
- The app saves your creation to your device’s camera roll
- You can also save the entire room setup to revisit later
- Share photos or videos with family members to gather feedback before purchasing
Step 7: Delete or Modify Items
- If you’re not satisfied with an item or arrangement, select the furniture piece
- Tap the delete icon to remove it
- Start fresh by selecting new items or repositioning existing furniture
Pro Tips for Furniture AR Visualization:
- Start with a clean, uncluttered floor for better detection
- Ensure adequate lighting in your space—the app works best in daylight or well-lit interiors
- Take photos of different room areas to test various furniture configurations
- Invite family members to participate in the AR visualization to ensure consensus before purchasing
- Save multiple room layouts to compare options before making final decisions
- Use the app to confirm furniture size—it accurately represents dimensions, helping you verify items will fit your space
General Tips for All AR Shopping Tools
Optimize Your Experience:
Lighting Conditions: Natural daylight produces the most accurate AR previews. If shopping indoors, position yourself near windows or under bright lighting. Avoid shadowy areas where the camera struggles to capture facial features accurately or detect floor surfaces.
Device Positioning: Hold your device at a comfortable angle—typically at eye level for beauty products and slightly elevated for furniture visualization. Avoid extreme angles that distort the preview.
Device Performance: Close unnecessary apps running in the background to ensure smooth AR performance. AR processing requires significant computational power; freeing up device resources improves frame rates and responsiveness.
Testing Before Purchasing: Use AR tools to test products multiple times before making purchasing decisions. Try different lighting conditions, times of day, and viewing angles to ensure accurate visualization.
Comparison Shopping: Use AR tools across multiple retailers’ apps to compare how the same product appears in different contexts. This comparative approach builds confidence in your purchasing decision.
Sharing for Second Opinions: Share AR visualizations with family members or friends through screenshots or in-app sharing features. Getting second opinions on significant purchases (furniture, high-end beauty products, expensive fashion items) can prevent regrettable purchasing decisions.
Image Quality Matters: For clothing try-ons requiring photo uploads, use high-quality, well-lit photos. Poor image quality produces inaccurate AR visualizations that may mislead your purchasing decisions.
Platform Specific Features:
- Web-based AR: Many brands now offer WebAR experiences directly on their websites, eliminating the need to download separate apps. Simply visit the brand website and tap the AR button to access try-on features.
- Social Commerce AR: Snapchat filters and Instagram AR experiences enable product try-on directly within social apps, allowing seamless shopping without leaving your preferred platform.
- In-Store Smart Mirrors: If shopping in physical locations, use in-store AR mirrors that enable virtual try-ons without changing clothes, allowing efficient product testing.
Troubleshooting Common Issues
AR Won’t Activate: Ensure your device’s camera permissions are enabled in system settings. Go to Settings > Privacy > Camera and confirm the app has permission. Restart the app if permissions were recently granted.
Furniture Won’t Place: If furniture placement is frustrating, ensure the floor is adequately lit and your device can detect the surface. Move the camera slowly and deliberately to allow the app to analyze the floor plane.
Inaccurate Makeup Color: Ensure good lighting when trying on makeup. The app’s color accuracy depends on lighting conditions. Try the same product in multiple lighting environments for comparison.
Slow Performance: Close background apps and restart your device. Clear the app’s cache by uninstalling and reinstalling it. Ensure you have sufficient storage space available.
Augmented reality shopping tools have democratized access to immersive product visualization, enabling confident purchasing decisions from home. Whether trying on makeup from Sephora, visualizing clothes through Google’s Virtual Try-On, or placing IKEA furniture in your living room, these tools follow similar interaction patterns: camera access, product selection, real-time visualization, and confident purchasing. By following these step-by-step instructions and implementing the optimization tips provided, shoppers can leverage AR technology to make better-informed decisions, reduce purchase uncertainty, and ultimately achieve higher satisfaction with their online shopping experiences.